I just wanted to stop in and tell you all Happy Valentine's Day and thank you so much
for your wonderful comments! I appreciate them all so much. It encourages me to keep
feeding my habit!! LOL!
Now go hug that significant other and enjoy yourselves today! Do something nice for
yourself, too!!!
I will be back very soon with some more goodies!!!
Monday, February 13, 2012
3D Valentine Boxes made during the class

This is mom and daughter with their completed boxes, aren't they beautiful???

Gracie is only 8 but did a superb job!!

Here's some close-ups

Gracie is planning on putting hers in her Victorian themed bedroom.

Simply beautiful and the little tree branch and nest add so much to it!

The pic just doesn't do this color justice, it's actually a beautiful dark cherry/burgundy.
She said she is still planning on adding a picture of her and Gracie so she's not quite finished with it but it turned out gorgeous!

Sunday, February 12, 2012
Valentine Box #2

This is the top of the box that I altered. This paper is from the K and Co. line of Kelly Panacci. I LOVE this paper!! So adorable and sweet. I used an envelope box again, covered it with the paper, added a strip of crocheted lace at the bottom and the top, some silk roses and leaves, string of pearls woven throughout the roses and then used one of the larger die cuts from the Bo Bunny Smoochable line inked the edges with brown dye ink, added the saying strip with red brads and made it so it came up just a bit like a handle.
Also, the brads were too red and garish looking to go with this line so I inked them up with the same brown dye ink as I did the edges of the die cut in and it was just enough to give it a darker red look to match a bit better and not stand out so starkly.

The front of the box I used a wooden button with a wooden bead topped with a pink flower button and hot glued it all together to make a faux drawer pull. The dimensional sticker on the front is from Anna Griffin. Isn't it wonderful how well all the die cuts and papers went together even though they aren't from the same companies???

This is the right side and more Anna Griffin dimensional stickers. The edge of the box was done with a red/pink distressed paper from the K and Co. line then I used a border punch around the entire edge.

This is the left side of the box, Anna Griffin dimensional stickers.

Closeup of the roses. They kinda look peach here but they are pink in real life. The darker ones are a deep burgundy.

Closeup of the die cuts on top of box.

This is the inside of the box. I made the top into a hinged lid just for something different. So now the "faux" drawer pull on the front is actually not faux after all!!
Valentine Box

I made this for display purposes at the LSS www.littlestampcorner.blogspot.com
It was made out of an old envelope box, covered with Bo Bunny Smoochable papers, ribbon and lace added to the edge of the lid.
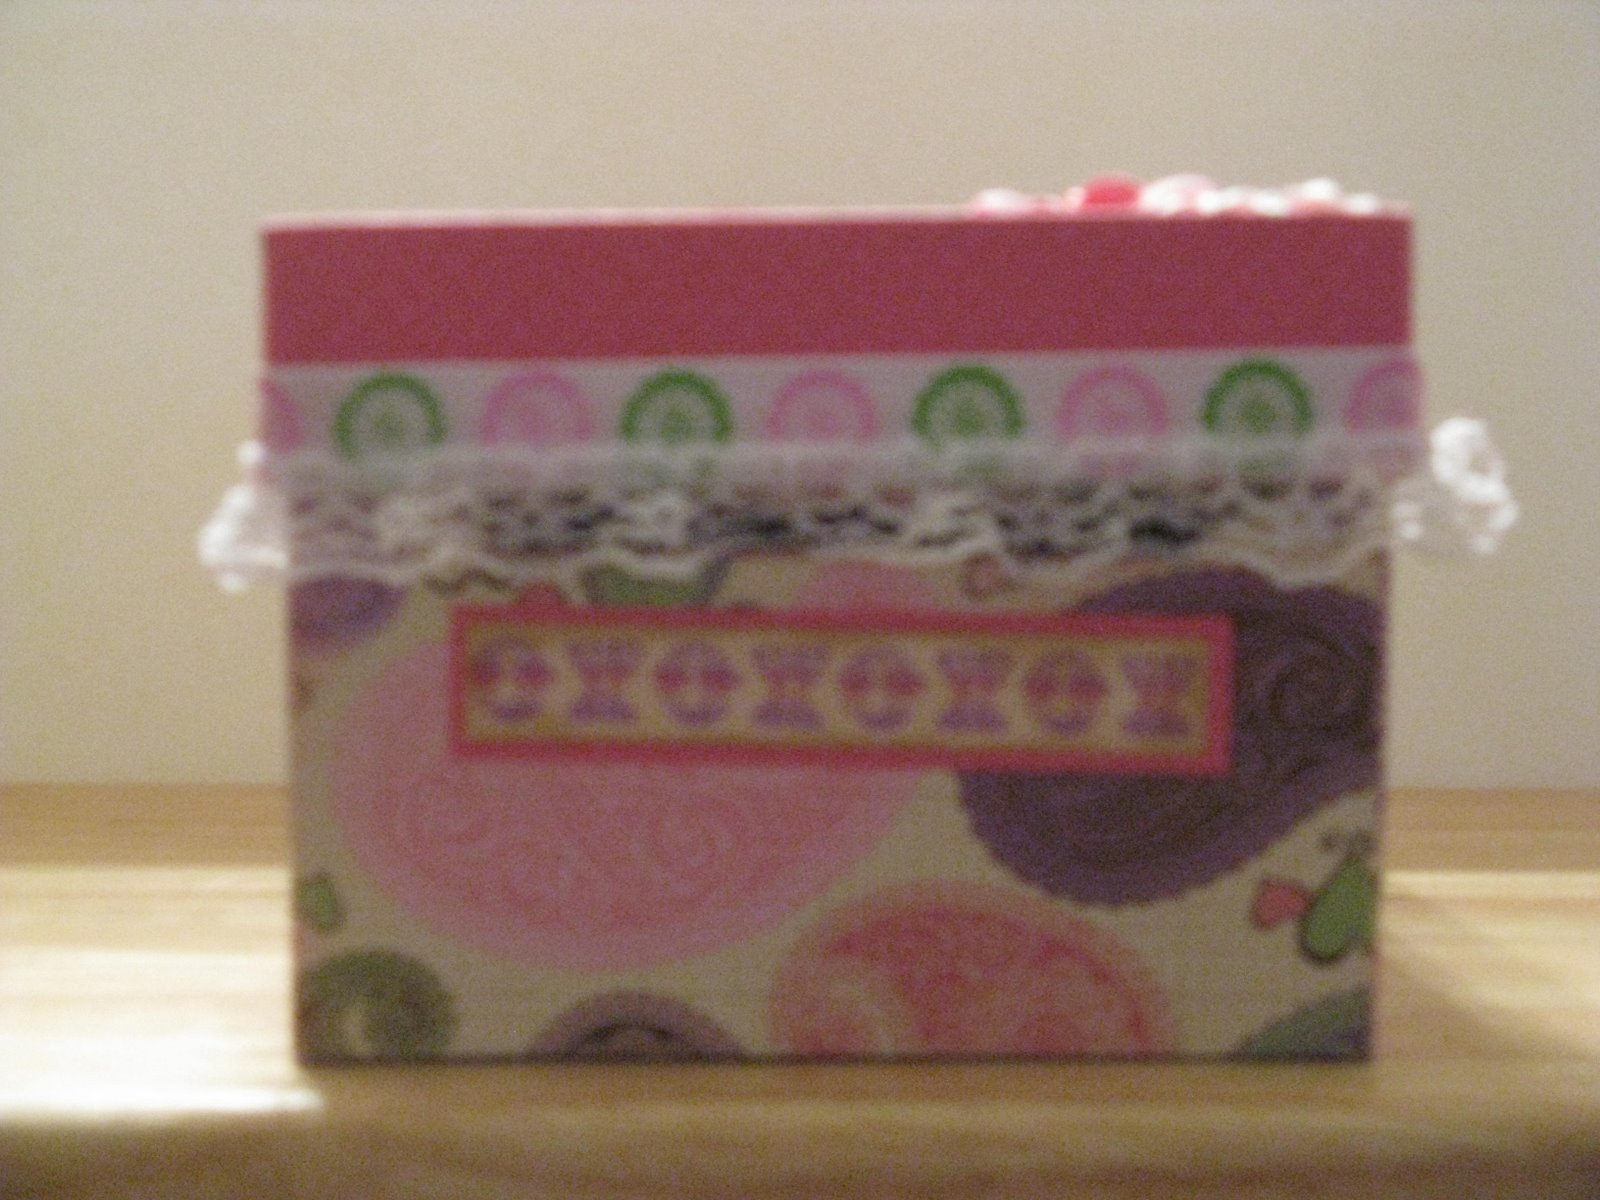
Sorry this pic isn't great. This is the front of the box and just above the sticker is a small slot for the Valentines to go in.

This is the top of the box. I used some of the die cuts from the collection, added a backing of pink behind the Candy label and punched it with a Fiskars border punch and added some paper flowers with dew drop centers.
I covered the inside of this box with just plain pink lightweight paper.
Let me know what you think!! LOVE the comments!
Satin Valentine Box

This was an old red candy box I repainted with pink paint, lined the inside with pink satin and stuffed it with polyfill to give it some poofiness. The outside was done with the same satin but instead of polyfill I used the batting cut out in a heart shape then I trimmed it up with some lace, string of pearls, pearl sprays, silk flowers and greenery. I really wanted to find one of those white frames from Michaels dollar bin to add to this but any Michaels store is at least 3 hours from me, so that didn't happen. Maybe eventually but not today :(

I made this for a sample to be displayed at the LSS www.littlestampcorner.blogspot.com I hope you all like it and I hope it gives you a bit of inspiration.
Friday, February 10, 2012
Doily and Pink Layout

This is a layout that my friend started and then couldn't decide what to do so she passed it off to me and I came up with this.
She used a cricut cut for the flowery heart cut out (not sure which one, sorry), a large square doily layered over pink Bazzill cardstock, pink tulle, pearl strand and a pic. Easy peasy!!
(check out the little kitty!!!)
Collaged Postcard

Unk. Rubberstamp, stamped with Memories black dye ink onto white cardstock, direct to paper method of applying color with Vivid ink pads, cut out edges with decorative scissors, layered onto pink cardstock, cut those edges with the same decorative scissors and layered it all onto a yellow card.
This is one of my very favorite cards. LOVE the colors on this one!
Sunday, February 5, 2012
Collaged Valentine

Unk. Rubberstamp, stamped in Memories black dye ink onto white cardstock, then I used direct to paper method of coloring the image with more dye inks and a Colorbox tool, tore the edges around the image and layered on red card.
Saturday, February 4, 2012
Love Cupid

Rubberstamp (unk), stamped with Memories black dye ink onto white cardstock, cut out with decorative scissors and layered onto a lighter pink cs, then edges cut with decorative scissors and layered onto a burgundy card.
3 Little Roses

These roses are one of my faves. Rubberstamp (unk), stamped two of them in Memories Black dye ink directly onto white card, colored with colored pencils and the third one colored with colored pencils, cut out then popped up with pop dots in between the other two.
Sorry it's blurry, must have been operator error--LOL~~
Subscribe to:
Posts (Atom)